CONTROLLABILITY CHECKS REQUIRED FOR UAS FLIGHT

Whether flying for the jobsite or flying for fun and family enjoyment, safety is always paramount with UAS (drones). There are the Federal Aviation Administration (FAA) regulations, also known as the FARs, and then there are the “Common-Sense” operational actions that all pilots, regardless of why the drone is flying, should be enacting prior to every flight.

Pre-flight checks aren’t just good practice; they are required by federal law under Part 107, section 49. These rules apply regardless of the reason for the flight (recreational or commercial).

Controllability checks address two of the five preflight requirements for drone flight. Prior to flight, pilots should be checking;

  • Weather Conditions (Winds, rain, heat, forecasts)
  • Environmental conditions (people, pets, buildings, trees, other potential threats/chellenges)
  • Physical state of the drone (props, batteries, fuselage, attached devices)
  • Any local laws or requirements (not all municipalities allow for drone takeoff/landing on public property)
  • FAA Airspace authorizations (Waivers, LAANC, etc)

This article focuses on controllability checks, which require less time to perform than the time you’ve already spent reading thus far! They are fast, efficient, and just plain best-practices for any drone mission or plan.

WHAT IS A CONTROLLABILITY CHECK?

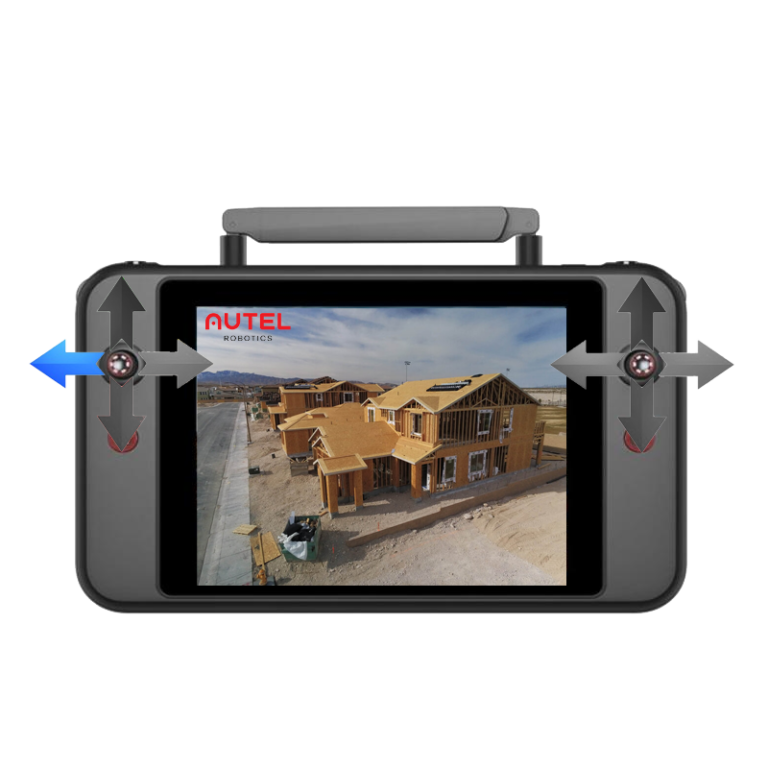
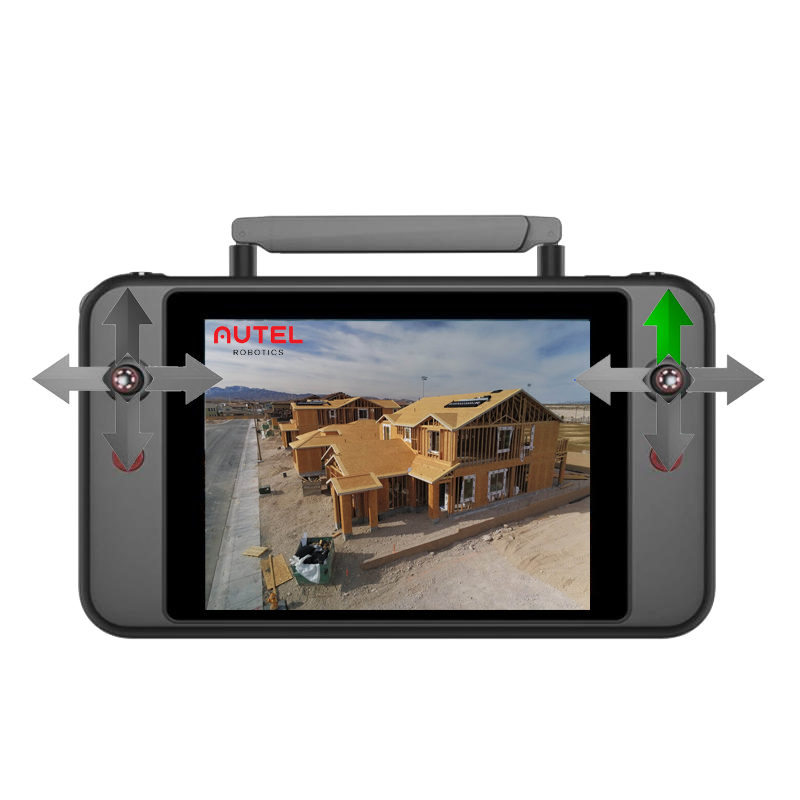
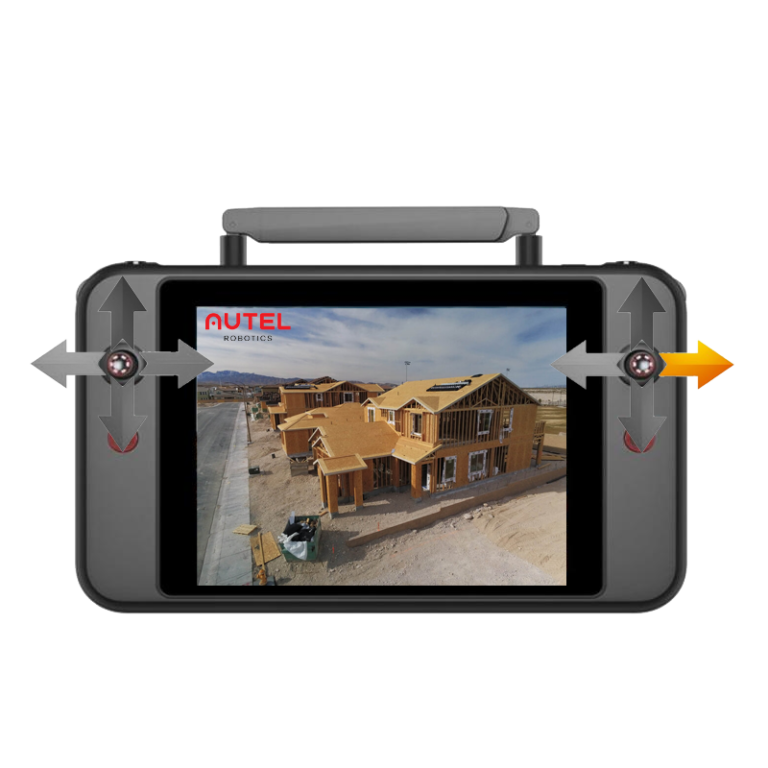
A Controllability check (logged as a C/C) provides pilots of an immediate awareness of the aircraft’s readiness for flight, and a means of ensuring all surfaces (props/hull/camera/telemetry/communications) are functioning to expectation and safety requirements.

HOW TO PERFORM A CONTROLLABILITY CHECK

After physically inspecting the props for cracks, ensuring any payload is securely attached to the hull, checking landing gear, motor arms, battery security/locked into body of UAS, and clearing the launch/land area, the aircraft is now ready for flight.

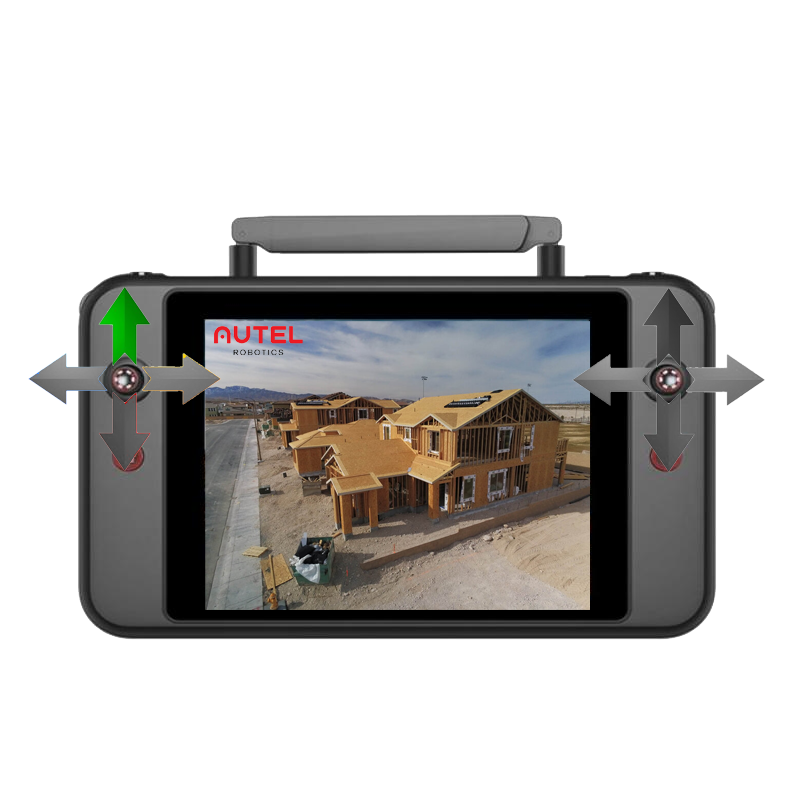
Launch the drone. We recommend launching to an altitude of approximately 12 feet, or higher than the tallest nearby human. Some pilots prefer to launch to an altitude of 2-3 feet, which suffices for controllability check, but does put the aircraft at a level that may harm humans in the event of an aircraft with flight control issues.

Once the drone is airborne and at a safe altitude, we’ll perform a controllability check.

The left stick was already used to launch the drone.

Using the left stick, test the YAW functions on the aircraft. Only the left stick should provide input to the aircraft. Pushing the stick LEFT (9 o’clock position) should cause the aircraft to rotate left. Next, do the same with the left stick pushed to the right. Again, the aircraft should rotate (YAW) to the right. 


Next, push the stick down. This should cause the aircraft to descend. Be sure the aircraft remains at a level that is above the heads of anyone in the immediate area. As mentioned previously, we typically perform these maneuvers at approximately 12’/4 meters.


Generally, we begin the controllability check with the left stick, as there is no dimensional movement through use of the left stick; the aircraft hovers in one place and moves within the “column” directly above the launch/land pad. Starting with the left stick is a small nod to the increased risk of horizontal/dimensional movement.

Now that we’re certain the left stick is controlling the aircraft as expected, we’ll move to the right stick. 

The right stick is a bit more dynamic, as it controls all horizontal movement of the aircraft, and the aircraft will move forward, backward, roll right, and roll left. 

We recommend that the first right stick movement is forward flight, to push the aircraft away from the (assuming pilot is slightly to the right/left and behind the aircraft) pilot, providing a safety buffer in the event of a radio problem. 

Now check the other three axis’ of the right stick, checking the roll right, roll left, and backward/reverse flight. 

These stick movements do not require “big” moves. In our training, we teach pilots to keep the aircraft in a 24″ square box area. In keeping the flight area very small, the aircraft will not be able to build momentum in the event of any obstacle that might be in the area. Additionally, a small area reduces the load on the battery, ensuring the longest possible flight time. 


And that’s all! Once the controllability check is completed and all control surfaces have been verified, the planned missions may begin.


Some pilots (and our policy) is to land the aircraft after the controllability check, and insert a fresh battery prior to beginning any mission. Each organization/business/operation will have their own standards and best practices. If a new, fresh battery was used for the C/C, and the C/C is performed rapidly, there is generally no issue with beginning the mission while the aircraft is hovering after the final stick/control check. 


Use your own best judgement; the key is to identifying consistent behaviors, processes, and checks to ensure the aircraft is ready to be flown or put into automated mission modes. 


Thanks for reading!


At KukerRanken, we’re dedicated to providing the best UAS information for Architects, Surveyors, Construction companies, and Engineers.  When questions arise, we’re here to provide answers.